
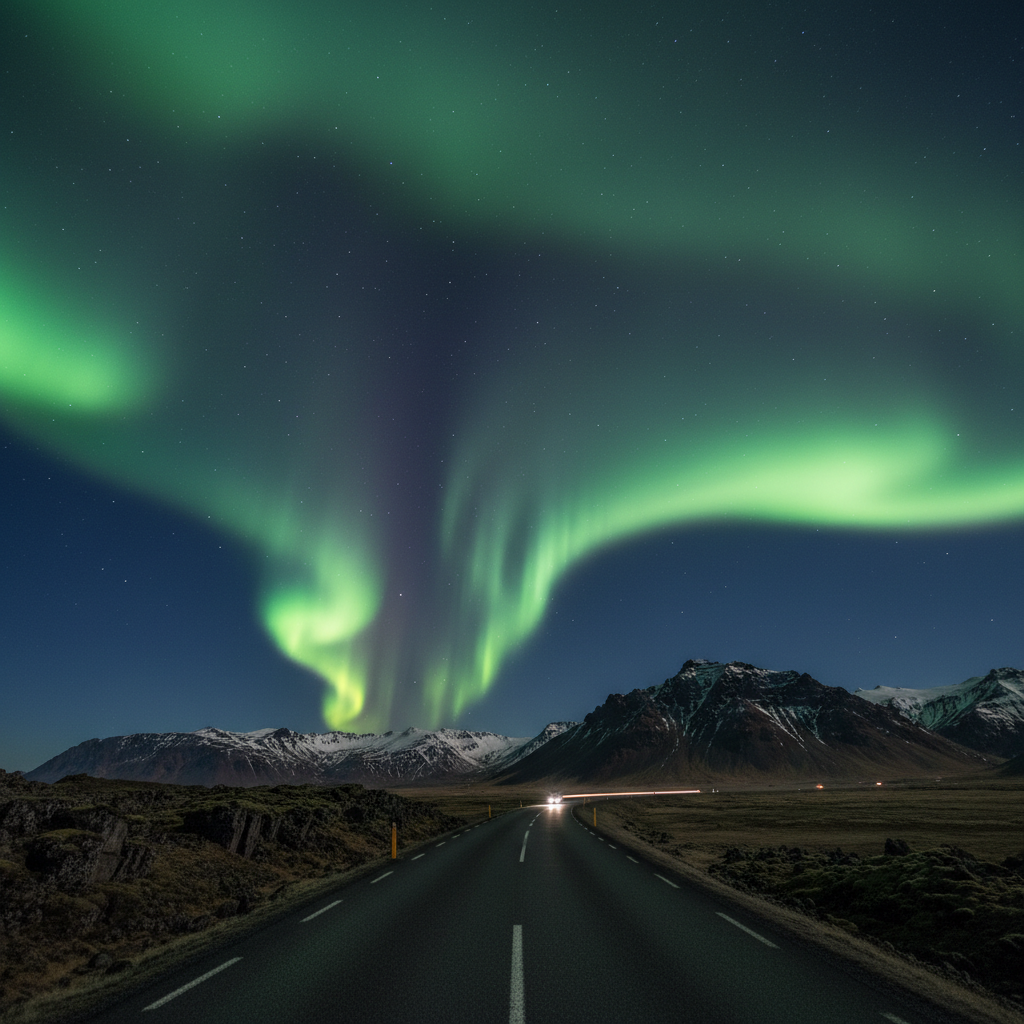
how to see northern lights in iceland comes down to three controllables you can actually plan around: darkness, clear skies, and getting away from city lights before you get tired and call it. If you’ve been scrolling aurora photos and wondering why your trip might not deliver, you’re not alone, Iceland can feel “easy” on paper and surprisingly tricky at midnight in wind and cloud.
What makes this worth paying attention to is simple: most aurora disappointment is logistics, not luck. People pick the right month but stay in Reykjavik’s glow, or they chase a “high KP” number while ignoring cloud cover, or they wait until 1 a.m. to decide where to go and end up watching from a parking lot under a streetlamp.
This guide focuses on the decisions that move the needle: when to go, where to base yourself, how to read forecasts without getting lost in jargon, and what to do on the night you finally see the sky “turn on.” I’ll also flag common misreads that waste hours, plus a quick packing list so you can stay outside long enough to enjoy it.
Pick the right season (and set expectations)
If your main goal is how to see northern lights in iceland, plan for the dark season, typically from late September through early April. You want long nights, not midnight sun, and you want flexibility to move around if weather shifts.
- Best general window: October to March tends to balance darkness with travel practicality.
- Shoulder months: September and April can work, but nights shorten and results vary.
- Mid-winter tradeoff: December–February offers long darkness, but storms and road closures can be more common.
One reality check that helps: aurora is not a scheduled show. Even in peak season you might need multiple nights, and sometimes the “boring” night surprises you while the hyped one clouds over.
Understand the 3 factors that decide your night
Most successful sightings happen when three conditions line up. Miss one, and you can spend hours outside with nothing to show.
1) Darkness
You need astronomical or nautical darkness. In practical terms, aim for a 2–4 hour window centered around local midnight, but don’t obsess over exact minutes, focus on being ready when skies clear.
2) Cloud cover (often more important than KP)
Clouds are the biggest deal in Iceland. A moderate aurora under clear skies beats a strong forecast hidden behind a thick cloud deck.
3) Low light pollution
Reykjavik can still work if you drive 20–40 minutes out, but if you stay under bright streetlights, you’ll miss faint aurora and reduce the drama even on stronger displays.
According to NOAA Space Weather Prediction Center, auroras become visible when geomagnetic activity interacts with Earth’s atmosphere, but what you see on the ground still depends heavily on local conditions like cloud cover and darkness.
Use forecasts the right way (simple, not obsessive)
Forecasts are useful, but they’re easy to misread. For how to see northern lights in iceland, treat them as planning tools, not promises.
- Aurora forecast (KP or activity level): Good for a rough “potential” level.
- Cloud forecast: Often the real decision-maker.
- Local weather (wind, precipitation): Tells you if driving is safe and if your camera will survive.
Many travelers fixate on KP like it’s a ticket number. In Iceland, a lower KP can still look great if you’re north of city lights under a clean, crisp sky.
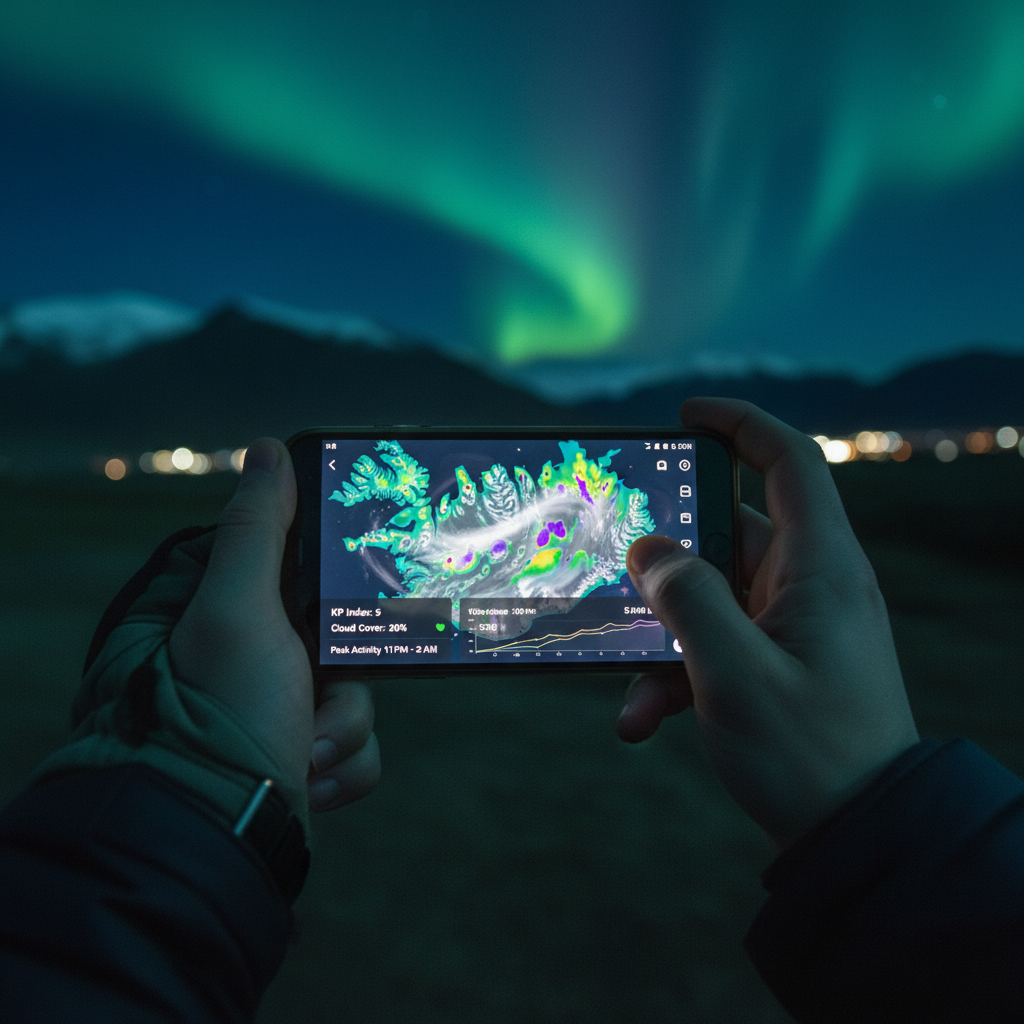
One more thing people underestimate: forecasts update constantly. Check once in the afternoon to sketch a plan, then again after dinner to confirm your target area still has clear pockets.
Where to go: choose “dark + accessible,” not just famous
There are plenty of iconic aurora photos from waterfalls and black-sand beaches, but the best spot is often the one you can reach safely and wait comfortably. If you’re trying to decide how to see northern lights in iceland without turning your trip into a stressful chase, build your nights around short drives and multiple nearby options.
Reykjavik area (easy, flexible)
- Drive out toward darker coastlines or inland viewpoints where streetlights drop off.
- Pick 2–3 pull-offs or small lots ahead of time so you’re not improvising on icy roads.
South Coast (popular for a reason)
- Strong mix of accommodations and open skies, but clouds can sit stubbornly along the coast.
- Have a backup inland route in case coastal cloud cover refuses to move.
North Iceland (often drier, longer darkness feel)
- When the north is clear, it can be excellent, but winter driving and distance require more commitment.
- Stay put for a few nights rather than doing one marathon drive.
A quick self-check: are you set up for a real chance?
Before you commit to a long night, run through this list. It’s boring, but it prevents the classic “we went out once and gave up” story.
- You have at least 2–3 nights you can try, not a single do-or-die evening.
- You can reach a dark spot within about 30–60 minutes from where you sleep.
- You’ve checked clouds for your exact area, not just “Iceland” as a whole.
- You can stay warm for 30–90 minutes outside without getting miserable.
- You have a plan for road safety if conditions change.
If you’re missing two or more items, your best upgrade is usually planning and comfort, not “better luck.”
Practical game plan for the night (step-by-step)
This is the simplest routine I’d recommend if you want how to see northern lights in iceland without overthinking it.
Before dinner
- Pick a primary spot and two backups within the same general region.
- Charge phones and camera batteries, cold drains them fast.
- Decide a cutoff time so you don’t wreck the next day’s drive.
After dinner
- Re-check cloud cover and wind, adjust your spot if needed.
- Get to your location earlier than you think, eyes adjust to darkness over time.
- Scan the sky, aurora can start as a faint gray “smudge” before it turns green on camera.
If you see nothing in 30–45 minutes
- Move to backup spot if the sky looks hazy or cloud bands creep in.
- If stars are sharp and it’s still quiet, waiting can beat driving.
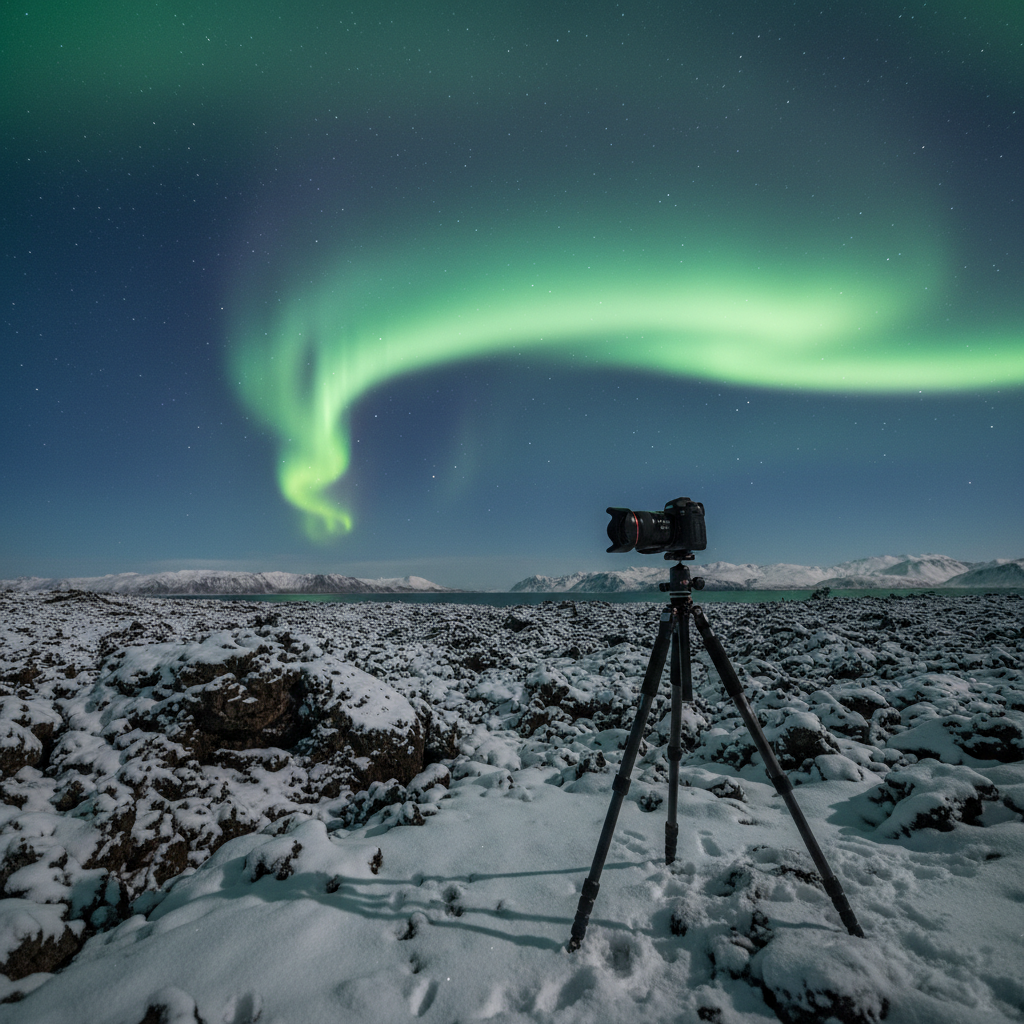
Camera and phone settings that usually work
You don’t need pro gear, but you do need to slow the shutter. Phones in Night Mode can capture aurora better than your eyes at times, which feels backward, but it’s common.
| Device | What to do | Typical starting point |
|---|---|---|
| iPhone/Android (modern) | Use Night Mode or a manual app, brace the phone | Night Mode max time, lowest ISO available |
| Mirrorless/DSLR | Manual mode, tripod, manual focus on a star | ISO 1600–3200, 2–8 sec, f/1.8–f/2.8 |
| GoPro/Action cam | Night-lapse mode, fixed mount | Long exposure night-lapse, wide lens |
Two small tips that save frustration: turn off flash (it ruins the scene), and lock focus (autofocus hunts in the dark). If aurora is moving fast, shorten exposure so it doesn’t blur into a green smear.
Safety, comfort, and the common mistakes that waste a night
Chasing aurora sounds romantic until you’re standing in sideways wind. Comfort is not “extra,” it’s the difference between staying out long enough and quitting right before the sky wakes up.
- Dress for standing still: warm layers, windproof shell, insulated boots, gloves you can operate a phone with.
- Road conditions matter: if roads look questionable, consider a guided tour or stay closer to your lodging. Driving tired on icy roads is a bad trade.
- Don’t park dangerously: use designated pull-offs, avoid stopping on narrow shoulders.
- Give your eyes time: bright screens and headlights reset night vision.
- Avoid the “single viewpoint trap”: if your spot has light pollution, move even a little.
According to Icelandic Road and Coastal Administration (IRCA), winter driving conditions can change quickly, and drivers should monitor road status and weather warnings, which is especially relevant when you’re out late searching for clear skies.
When a tour (or local help) makes more sense
If your trip has limited nights, if you’re not comfortable driving in winter, or if you just want someone else to do the weather math, a guided aurora tour can be a practical choice. You’re paying for local judgment, flexible routing, and a driver who stays focused.
Also consider asking your hotel, guesthouse, or local host how the sky “behaves” in that area, many places know which direction clears first after a passing front. It’s not magic, just pattern recognition.
Key takeaways to remember
- Cloud cover and darkness beat hype, pick clear pockets and get away from bright lights.
- Build multiple attempts into your itinerary, one night often isn’t enough.
- Choose accessible dark spots you can reach safely, comfort keeps you outside longer.
- Use simple camera settings, and don’t be surprised if your phone sees color before your eyes.
If you want a clean plan, pick your base, map two dark locations nearby, check clouds after dinner, then commit to staying out for at least 45 minutes in a safe spot. That routine won’t guarantee aurora, but it usually puts you in the right place when the sky cooperates, and that’s the whole point.
If you’re planning a short Iceland itinerary and you’d rather not spend your evenings guessing, consider booking one aurora tour early in the trip and keeping one additional night for a DIY attempt, it’s a balanced way to improve your odds without turning every night into a chase.