
travel multi tool handy sounds like a small thing, until you’re stuck with a loose backpack strap, a dead flashlight, or a cut that needs a clean trim on gauze and tape.
Most “emergencies” on the road are really just annoying friction points, but they snowball fast when you’re tired, it’s dark, and you’re far from a store. A well-chosen multi tool helps you handle quick fixes without overpacking.
This guide focuses on practical, legal, and safety-minded ways to pick and carry a travel multi tool for emergencies, plus realistic scenarios where it actually earns its space. I’ll also call out common mistakes, like buying a “50-in-1” gadget that fails at the three tools you truly need.
What “emergency” usually means when you travel
For most travelers, emergencies aren’t movie-level survival situations, they’re small problems you need to solve in minutes so your day doesn’t collapse.
- Gear failures: broken zipper pull, loose screw on sunglasses, fraying strap, cracked phone case, tent stake issues.
- Room and rental annoyances: stuck battery cover, wobbly chair screw, package opening, quick cord management.
- Outdoor and road moments: cutting cord, tightening a stove knob, trimming moleskin, grabbing hot items, minor bike adjustments.
- Personal care crossover: nail snag, splinter removal, cutting tape or gauze in a first-aid situation.
That’s why “handy” matters more than “tactical.” If it’s uncomfortable, heavy, or awkward, it stays in the bag and you still end up borrowing a flimsy hotel scissors.
Key features that make a travel multi tool actually handy
When people regret a purchase, it’s usually because they chased feature count, not usability. Here’s what tends to matter most in real travel use.
1) Tool quality over tool quantity
- Pliers with a solid grip beat tiny decorative pliers, especially for pulling a stuck zipper or bending a wire.
- Scissors that cut cleanly handle tape, fabric threads, and first-aid tasks more safely than a dull blade.
- Drivers that fit common screws (Phillips and flat) solve more problems than niche bits you never use.
2) One-hand access vs. “it’s somewhere in the handle”
A tool you can open safely without wrestling it matters when you’re on a curb, in wind, or balancing a bag. If you can’t access scissors quickly, you’ll default to tearing tape and making a mess.
3) Locking and ergonomics (comfort is safety)
Locking blades and tools reduce slip risk, but add bulk and sometimes extra scrutiny in transit. Ergonomic handles reduce hand fatigue when you’re tightening something stubborn.
4) Corrosion resistance and easy cleaning
Beach trips, humidity, and spilled drinks happen. Stainless steel and simple joints are easier to rinse and dry. If you plan to use it near food or first-aid supplies, easy cleaning is a real factor.
Travel rules: what you can carry, where, and why it’s tricky
This is the part many people skip, then end up losing a tool at security. Laws and airline policies vary, and they can change, so treat any checklist as “current best effort,” not a guarantee.
According to TSA, knives and sharp objects are generally not allowed in carry-on luggage, while many tools are permitted in checked baggage, with exceptions and limits depending on the item.
- Flying: if your multi tool includes a blade, assume it belongs in checked luggage. Even small blades can be flagged.
- Events and venues: stadiums, concerts, and courthouses often ban multi tools entirely, regardless of blade length.
- International travel: rules vary widely, and some countries treat multi tools as weapons. If you’re unsure, consider a blade-free option.

If you want something you can keep with you, look for blade-free travel tools (pliers, scissors may still be restricted depending on length and security interpretation) or choose a small repair kit that relies on non-sharp tools.
If you’re traveling for work, it’s often simpler to keep a dedicated “checked-bag tool pouch,” so your everyday bag stays airport-friendly.
Quick self-check: what kind of traveler are you?
Before you buy anything, match the tool to the friction you actually have. Here’s a fast way to sort it out.
- Urban + hotels: you’ll use scissors, small driver, bottle opener, tweezers, and a file more than heavy pliers.
- Road trips: pliers, driver, small pry tool, and a compact flashlight matter, plus zip ties and tape.
- Camping/light hiking: scissors, tweezers, driver, and a blade (checked baggage if flying) plus first-aid compatibility.
- International + carry-on only: prioritize blade-free and venue-friendly designs, or plan to buy a cheap tool locally and donate/dispose before flying home.
If you read that list and thought “honestly, I just need something for packages and loose screws,” a simple, smaller multi tool often beats a bulky one.
Scenario-based fixes you can actually do on the go
Here are common travel problems where a travel multi tool handy setup earns its keep, with simple steps that don’t assume a full workshop.
Loose backpack strap screw or luggage handle wobble
- Use the correct driver tip, press firmly to avoid stripping.
- If the screw keeps backing out, add a tiny strip of tape to the threads as a temporary fix.
- Don’t overtighten plastic parts, they crack easily.
Broken zipper pull
- Use pliers to thread a small split ring, paperclip, or paracord loop through the zipper tab.
- Pinch gently to close the ring, check it doesn’t snag fabric.
First-aid support: cutting tape, trimming gauze
- Use scissors rather than a blade when possible, it’s easier to control.
- Clean the tool before and after, especially if it touches skin or dressings.
- If a wound looks deep, contaminated, or won’t stop bleeding, seek medical help rather than “fixing it” with tools.
Splinter or thorn removal (light duty)
- Wash hands, use clean tweezers, pull in the same direction it entered.
- If it breaks under skin or shows signs of infection, a clinician may need to remove it safely.
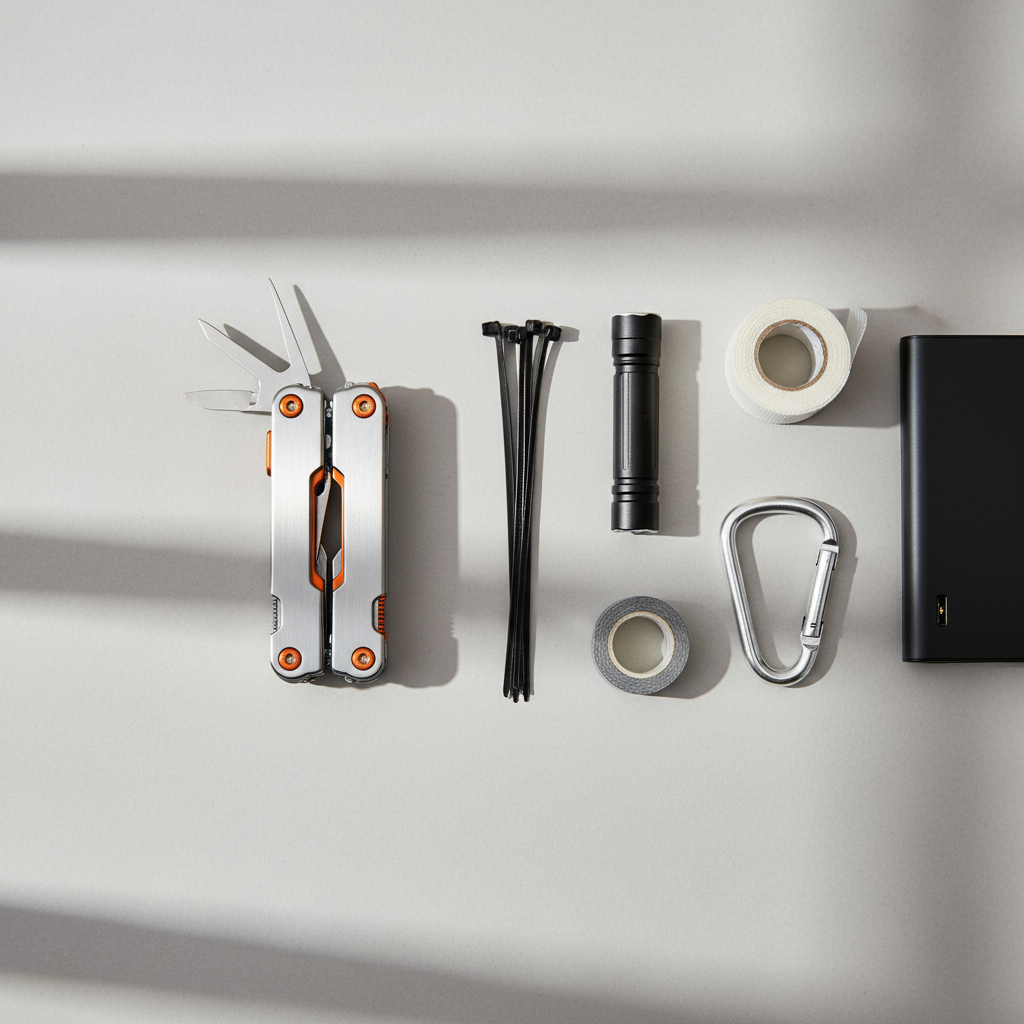
A simple packing setup (tool + small add-ons) that works
A multi tool solves the “mechanical” part, but tiny add-ons often make the difference between a clever hack and a clean repair.
| Item | Why it’s worth packing | Travel note |
|---|---|---|
| Travel multi tool (chosen for your trip) | Fast fixes for gear, screws, cutting tasks | Blade tools often belong in checked bags |
| Mini duct tape wrap (on a card) | Repairs, blisters, bundling cables | Keep it flat to save space |
| Zip ties (small) | Temporary strap and gear fixes | Cut ends flush to avoid sharp edges |
| Small flashlight or headlamp | Night checks, roadside visibility | Keep batteries charged |
| Alcohol wipes | Quick cleaning for tools and hands | Follow liquid rules if flying carry-on |
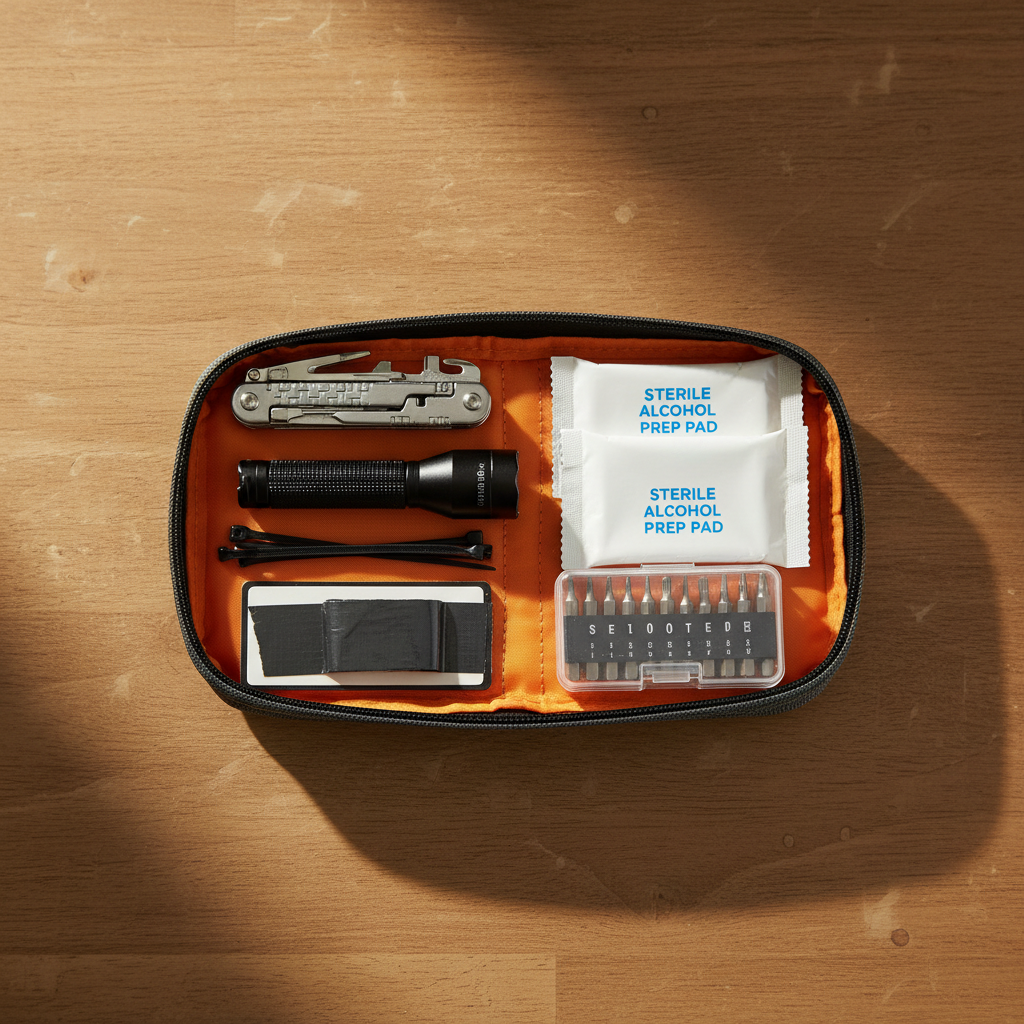
This combo stays light, solves the most common travel headaches, and doesn’t force you into a “survival kit” mindset if that’s not your travel style.
Mistakes that waste money (or get your tool confiscated)
- Buying too big: if it’s uncomfortable in-pocket and annoying in a bag, you stop carrying it.
- Ignoring scissors quality: dull scissors turn simple tasks into frustration, and can be less safe.
- Assuming TSA will “make an exception”: security decisions can vary by agent and airport, plan for the strict interpretation.
- Using dirty tools on skin: for first-aid-adjacent tasks, clean the tool and consider single-use options when appropriate.
- Overrelying on a blade: many travel fixes are better solved with drivers, pliers, tape, and ties.
If your main goal is airports + day-to-day convenience, a travel multi tool handy setup often means “smaller, simpler, and compliant,” not “more aggressive.”
When it’s smarter to get professional help
Some situations look fixable but can turn into liability or a safety issue.
- Car trouble beyond basics: if you suspect brakes, steering, or electrical faults, a mechanic is the safer choice.
- Medical issues: deep cuts, suspected infection, severe allergic reactions, or uncontrolled bleeding need medical attention.
- Gas appliances and high heat: if you smell gas or suspect a leak, stop and contact the property host or local services.
- Electrical outlets and panels: avoid “quick fixes” that risk shock or fire.
Being prepared includes knowing when not to DIY, especially when you’re traveling without your usual resources.
Conclusion: pick the tool you’ll actually use
A travel multi tool handy choice isn’t about having a gadget for every scenario, it’s about covering the few problems that reliably pop up: small cuts, loose screws, stuck zippers, and quick repairs that keep your trip moving.
If you take one action today, make it this: write down the last three “annoying fixes” you needed while traveling, then choose a multi tool that solves those exact moments, and pack it in the right place for your trip.
FAQ
What makes a travel multi tool handy for emergencies versus everyday carry?
Emergency travel use leans toward fast repairs and basic first-aid support, so scissors, drivers, and decent pliers tend to matter more than extra blades or specialty tools.
Can I bring a multi tool on a plane in my carry-on?
Many multi tools with blades are not allowed in carry-ons. Policies and enforcement can vary, so if it has any knife component, checked luggage is usually the safer plan, and you should verify current rules before you fly.
Is a blade-free multi tool worth it?
Often, yes, especially for carry-on-only travelers. You lose some cutting power, but you keep pliers and drivers that handle a surprising share of travel problems.
What’s the most useful add-on item to pair with a multi tool?
Mini duct tape and a few zip ties punch above their weight. They turn “I can hold this in place” into “this stays fixed until I get home.”
How do I clean a multi tool after using it for first-aid tasks?
Wipe visible debris, then use alcohol wipes when appropriate and let it dry fully. If there’s any concern about contamination, it may be safer to replace small accessories or consult a professional for medical guidance.
Should I buy a cheap multi tool for travel to avoid losing an expensive one?
It depends on how much you’ll rely on it. Cheap tools can be fine for light tasks, but poor drivers or flimsy scissors fail at the exact moment you bought them for, so “cheap” can become “twice.”
What’s a realistic use case where a multi tool saves the day?
Loose screws on sunglasses, a zipper pull that snaps, or a strap that needs a temporary tie-off are classic examples. They’re small issues, but fixing them quickly keeps the rest of the trip calm.
If you’re trying to build a simple, airport-aware setup, it helps to decide whether you want a blade-free tool for daily access or a more capable tool you keep in checked baggage, either way, a small “repair pouch” mindset usually beats carrying a heavy gadget you never reach for.