
Travel vlogging equipment matters most when it keeps you filming on days you’re tired, rushing, or stuck with bad light and noisy streets. Most people don’t quit because their camera “isn’t good enough”, they quit because their setup is annoying to carry, slow to deploy, or the audio turns out unusable.
This list is built around real travel constraints: weight limits, unpredictable weather, crowded places, and the simple truth that you’ll miss shots if your gear requires a full build every time. You’ll get a practical kit blueprint, a quick self-check to match gear to your style, and a few “skip this” notes that save money.
One more thing before we get into shopping: the best setup is usually the one you can operate one-handed, charge easily, and trust without fiddling. The goal is consistency, not perfection.
What to prioritize (so you don’t overbuy)
If you only remember one rule, make it this: audio and stability upgrade “watchability” faster than resolution. A mediocre image with clean speech feels intentional, while a crisp 4K clip with windy, echoey audio feels like a mistake.
- Audio clarity (wind, traffic, indoor echo) determines whether viewers stay.
- Fast setup determines whether you capture moments at all.
- Battery + storage determine whether you can film all day without anxiety.
- Comfort matters because travel days are long; heavy rigs get left behind.
According to the U.S. Federal Aviation Administration (FAA), spare lithium batteries should typically be carried in carry-on baggage, not checked, and terminals should be protected from short-circuiting. Airline policies vary, so it’s worth checking your carrier before you fly.
Quick self-check: match gear to your travel style
Before buying anything, decide which lane you’re actually in. Most gear regret comes from picking a setup that fits someone else’s workflow.
- Run-and-gun city vlogs: prioritize stabilization, fast autofocus, compact mic, and one “do-it-all” lens.
- Talking-head narration: prioritize a reliable wireless mic, skin-tone-friendly exposure, and a simple key light (even a tiny one).
- Outdoor/adventure: prioritize weather resistance, wind protection, rugged mounting, and power management.
- Food + interiors: prioritize low-light performance, a wider lens, and controlled audio in echoey rooms.
If your filming time is mostly evenings or indoors, you’ll feel a bigger difference from a bright lens and clean audio than from upgrading to a pricier body.

The core travel vlogging equipment checklist (with smart defaults)
This is the core kit that covers most travel content without turning your bag into a rolling studio. Think of it as “minimum viable pro”.
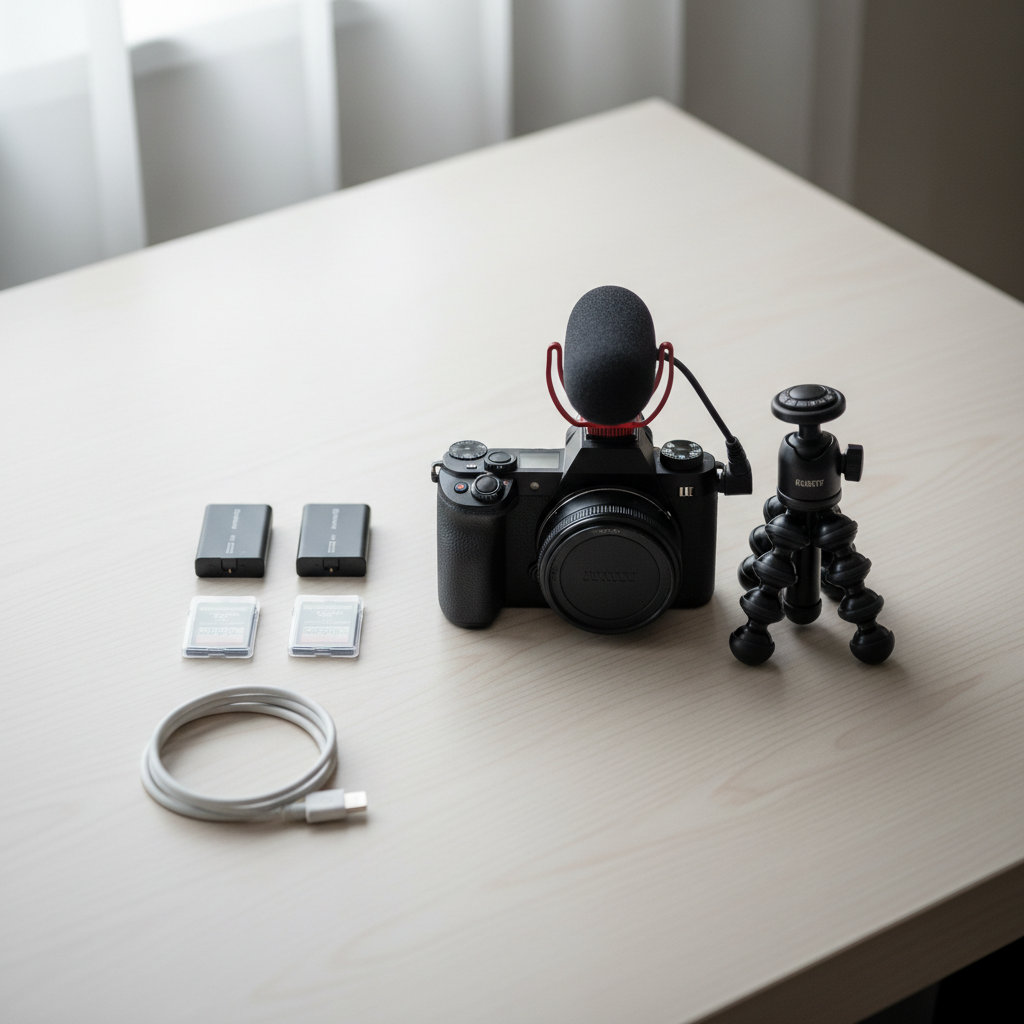
1) Camera (or phone) that you’ll actually carry
Modern phones can be enough if you control audio and light. Dedicated cameras still help when you need better low light, background separation, and faster lens options. Many creators do a hybrid: phone for quick B-roll, camera for hero shots.
- Phone route: add a grip, external mic support, and a small tripod.
- Camera route: prioritize dependable autofocus, flip/tilt screen, and strong in-body or lens stabilization.
2) Microphone (the most common bottleneck)
For travel, wireless mics are convenient for walk-and-talk, while small on-camera mics work well for general ambience and quick clips. In windy locations, a windscreen is not optional.
- Wireless lav: best for narration and interviews; watch for clothing rustle.
- On-camera shotgun: fast and simple; still needs wind protection outdoors.
3) Stabilization: small tripod, mini tripod, or gimbal?
Most people buy a gimbal, then stop using it. A compact tripod or mini tripod often wins because it’s faster and “good enough”. If your style is smooth walking shots and you’ll commit to charging and balancing, a gimbal can be worth it.
- Mini tripod/handheld tripod: best daily driver for travel vlogging.
- Full-size travel tripod: best for night shots and time-lapses.
- Gimbal: best for intentional cinematic movement, higher maintenance.
4) Light (tiny, controllable, and not embarrassing to use)
A small adjustable LED helps in hotel rooms, restaurants, and night markets. Look for adjustable brightness and color temperature so your skin doesn’t go orange or green under mixed lighting.
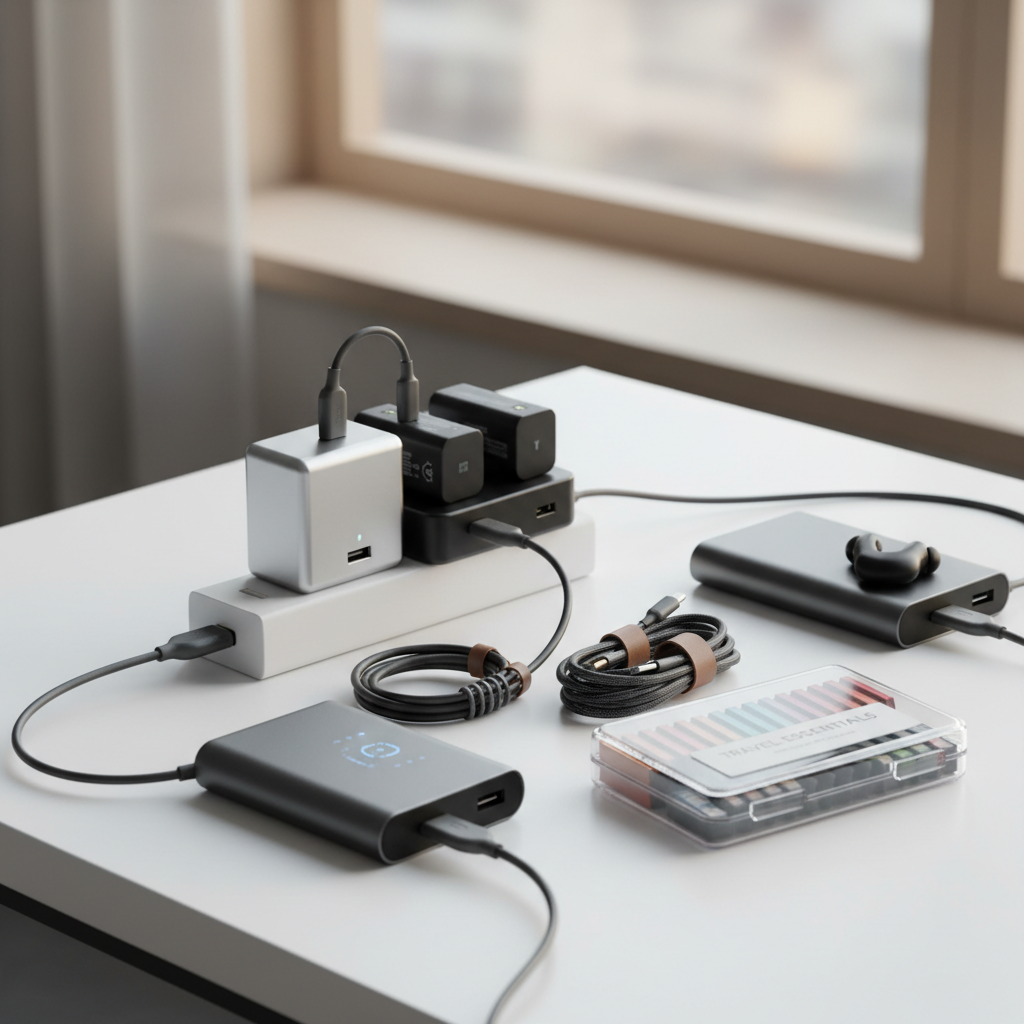
5) Power and storage (the quiet heroes)
- Spare batteries (or a plan for USB-C power delivery)
- High-quality memory cards plus a protective case
- Power bank that can charge your camera/phone reliably
- Simple charger setup so you don’t play cable roulette at midnight
A practical kit table: what to buy first (and what can wait)
If you’re building from scratch, this order tends to produce the fastest quality jump for the least friction.
| Priority | Item | Why it matters on the road | Can you delay it? |
|---|---|---|---|
| 1 | Wireless mic or compact on-camera mic | Fixes wind/noise issues that ruin clips | Only if you film silent b-roll |
| 2 | Mini tripod/handheld grip | Stability + faster setup + better framing | Not really, it’s cheap and useful |
| 3 | Extra power + storage | Prevents missed moments and corrupted workflows | You can start lean, but you’ll feel the pain fast |
| 4 | Small LED light | Makes indoor/night footage usable | Yes, if you film mostly daytime |
| 5 | Secondary lens or gimbal | Style upgrade, not a survival tool | Often yes |
Real-world setup ideas by scenario
Here are three setups that tend to work in the real world, where you’re juggling maps, snacks, and a crowded sidewalk.
Scenario A: “I vlog mostly outdoors, walking and talking”
- Camera/phone with solid stabilization
- Wireless mic with wind protection
- Mini tripod/handheld grip
- Power bank + short cable
Tip: record a 10-second test clip when you step outside. Wind changes quickly, and fixing it in editing is limited.
Scenario B: “I film in hotel rooms and cafés”
- Wireless mic (echo reduction starts with mic placement)
- Small LED light at low brightness
- Mini tripod for stable framing
Tip: in echoey rooms, get closer to the mic rather than cranking gain. You’ll pick up less room sound.
Scenario C: “I want cinematic b-roll, but I still need speed”
- Camera with a versatile lens (wide-to-standard is convenient)
- Mini tripod plus a lightweight travel tripod for nights
- Optional gimbal if you’re committed to using it daily
Tip: don’t stack complexity on moving days. Pick one “cinematic tool” per day, not all of them.
Key takeaways for buying smarter
- Buy for the clip you shoot most often, not the clip you wish you shot.
- Audio upgrades beat camera upgrades for most beginner-to-intermediate travel creators.
- Friction kills consistency, so smaller and simpler often wins.
- Power and storage are part of the creative process, because dead gear equals no story.
Common mistakes (and what to do instead)
Mistake: buying a heavy “pro” rig, then leaving it in the room.
Do instead: build a compact baseline kit, then add one upgrade after two trips when you know what annoyed you.
Mistake: filming everything handheld with no stabilization plan.
Do instead: keep a mini tripod attached, even if you never deploy the legs, it steadies your grip.
Mistake: assuming “I’ll fix audio in post”.
Do instead: get the mic closer, use a windscreen, and watch input levels so you avoid clipping.
Mistake: ignoring local rules and social comfort.
Do instead: in sensitive locations, ask staff when appropriate, keep your setup small, and avoid blocking walkways. Rules vary by place, and if you’re unsure, it may help to check local regulations or consult a professional.
Practical workflow: a simple travel filming routine
This is the part that makes travel vlogging equipment feel effortless. A routine beats a gear pile.
- Night before: charge everything, clear cards, pre-pack cables in one pouch.
- Morning: mount mic, quick audio test, confirm time/date for easier sorting.
- During the day: capture short “anchor” clips explaining what’s happening, they save your edit.
- End of day: back up if you can, even to a second drive or cloud when Wi‑Fi allows.
According to the U.S. Department of Homeland Security (TSA), security screening rules can change and may vary by airport, so checking current guidance before flying with camera batteries, power banks, and electronics is a low-effort way to avoid a bad surprise at the checkpoint.
Conclusion: build the kit you’ll use, not the kit you’ll admire
Travel vlogging equipment should reduce stress, not add it. Start with clear audio, stable framing, and a power plan, then upgrade based on what your last trip exposed, not what social media glamorizes.
If you want a concrete next step, pick one scenario above, write down the three items that would make filming easier this week, and buy only those. Your future self, editing at 1 a.m., will thank you.
FAQ
What is the best travel vlogging equipment for beginners?
Usually it’s a simple setup: the camera you already have, a reliable mic, and a mini tripod. Beginners improve faster when the kit is easy to deploy and the audio stays clean.
Do I need a gimbal for travel vlogs?
Not always. If you love smooth walking shots and you’ll actually charge and balance it, a gimbal helps. For many travelers, a mini tripod and good stabilization deliver most of the benefit with less hassle.
Is a phone enough for travel vlogging?
For many situations, yes, especially in good light. The usual weak spot is audio, so pairing your phone with a compact mic can be a bigger upgrade than switching devices.
What mic works best in windy locations?
A mic with solid wind protection, plus a proper windscreen, makes the biggest difference. Wind conditions vary a lot, so a quick test recording outdoors is worth the extra 10 seconds.
How do I keep my gear charged while traveling?
Keep a power bank, short cables, and a multi-port charger in one pouch, and charge whenever you have predictable downtime. If you rely on spare lithium batteries, check airline policies and pack them safely in carry-on.
What’s the smartest lens choice for travel vlogging?
A versatile zoom or a wide-to-standard range is popular because it reduces lens swaps on the street. If you shoot mostly indoors, a brighter lens can help more than an extra focal length.
How much travel vlogging equipment should I bring on a short trip?
Bring the smallest kit that covers your “must-have” shots, typically camera/phone, mic, mini tripod, and power. Short trips are where heavy kits get abandoned fastest.
If you’re trying to keep your bag light while still improving your footage, it may help to share your typical shooting scenario and budget, then build a tight kit around audio, stability, and power instead of chasing specs.